Posts Tagged ‘conversion’

++BEGIN TRANSMISSION++

Greetings. You’d have to be silly to overlook the Vendetta in the 5th edition of the Imperial Guard. Relatively cheap, decently armoured, and armed with three twin-linked lascannons, there really isn’t much lacking there. One problem though: the only official model is Forge World. Darn. But with some elbow grease and bitz, your very own converted Vendetta is not far away! This post will not have the detail of the previous post (mostly because I did most of this conversion well before the idea of starting a blog even began to percolate), but I think the simplicity of the conversion speaks for itself. Happy tank hunting!

Shopping List:

1. Four lascannons and their power cells from the Cadian Heavy Weapons sprue.

2. Two of the medium sized track guards from the IG Tank Accessories sprue.

3. Twin-linked lascannon arm from the Space Marine Dreadnought sprue

4.Green Stuff

5. IG Valkyrie (obviously)

HOW TO:

1. Assemble the Valkyrie as instructed, with the following exceptions: Do not assemble the wing weapons (That’s what we are converting) and do not glue the hull mounted weapon on (the multi-laser or single lascannon that goes on the right side of the nose). I also chose not to glue the wings onto the hull: they fit there quite nicely without glue, and it will make storage and transportation much easier.

2. Cut the weapon (I used the lascannon) from the hull-mounted weapon that comes with the Valkyrie. This should leave you with the flat base that will fit inside the cowling. Glue this in position.

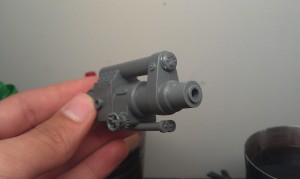
3. Trim the twin-linked lascannon arm so you have the weapon seperated from the shoulder. Insert and glue this into the cowling on the side of the hull. I wish I had a picture of where I cut it, but I hope this picture suffices:

4. Grab a pair of the Cadian Heavy Weapon lascannons, and file down the sides so that they lie flush next to each other. Then glue the track guards on top, filing as necessary to get a good fit. Repeat, to get a total of two sets.

5. Glue the lascannon power pack onto the sides of your TL mounts. I chose to mount them towards the outside of the gun. On one side, the power pack will cover the hole that you see in the pictures above (where the power cable would usually go). On the other side, use a little green stuff to cover the hole.

6. Glue your lascannons onto the wing struts. I put a thin roll of green stuff inside the strut (it is U-shaped to allow the standard weapons to glue in more easily, but would otherwise  leave a gap with our lascannons). Repeat for each side.

7. You are now finished with your Vendetta! Here are some pictures:

"The Moanin' Lisa", Valkyrie V-10 "Vendetta" C5R

++THOUGHT OF THE DAY: Blessed are the Gun Makers. ++

++END TRANSMISSION++

++BEGIN TRANSMISSION++

And now for the inaugural article! First, a little history – the reason I started the Forge Floor was due in part to the frustration of not finding a single tutorial on how to convert the Griffon heavy mortar on the internet. I found plenty of pictures, suggestions on chat room and forums, but nowhere could I find a good conversion guide. This is my attempt to redress this wrong.

I wanted a Griffon because, in my opinion, pound for pound, there is not a better unit in the Guard codex at this time of writing. Everything you take should be compared with a Griffon – it’s that good, and that cheap. Unfortunately, the only models for it are out of production or expensive Forge World kits. This conversion uses the Basilisk kit as its base, making it a little easier to create.
SHOPPING LIST

  1. Imperial Guard Basilisk
  2. Road Wheel sprue from the older vehicle kits
  3. Chaos Marauder head (optional)
  4. Cadian heavy weapons crewman (optional)
  5. Random Imperial grubbins from your bitz box (optional)
HOW TO
  1. Assemble the main chassis of the Basilisk as per normal, with one exception – do not put the t-shaped plate that the Earthshaker cannon would normally be mounted in. Just leave the back empty.
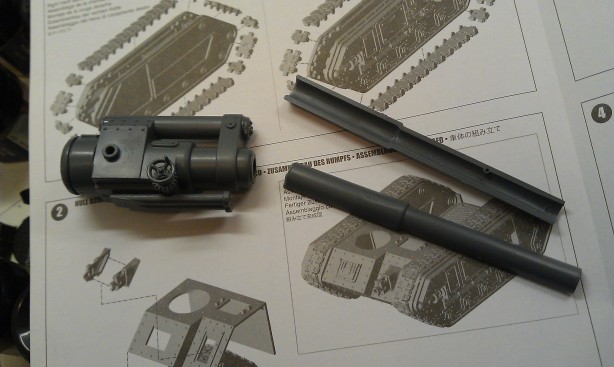
  2. Using a good pair of plastic clippers, cut the Earthshaker barrel like so:
    Where to cut the cannon.
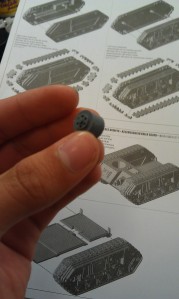
  3. Take one of the smaller road wheels (they look like this):
    the road wheel
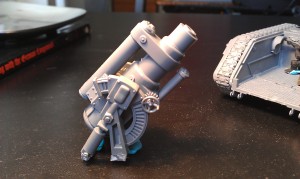
  4. Glue the wheel to the end of your clipped Earthshaker cannon: it helps it look more like an actual gun and less like you cut a different gun in half). Obviously, glue it so that the hollow end is pointing towards the enemy.main gun piece
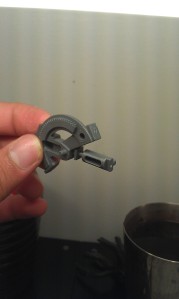
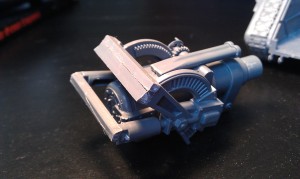
  5. Now you want to clip the pegs off the gun brackets like so:
    cutting the pegs
  6. Now, this is the tricky bit. Place the gun brackets on either side of the heavy mortar as you would for the Earthshaker. I found that I had to glue them together in order for the mortar to stay pointing in a realistic way. Cut sections from your sprues ( you should have plenty, because you just bought a Basilisk) and glue them to the bottom of the gun brackets. Note that because the sprues are a trapezodial shape, not right angles, you will have to turn one of them upside down to make a smooth brace. Here is a picture, so add a thousand more words to this explaination. 
    view of the sprue-braces
  7. Admire your heavy mortar in all its glory!boom!
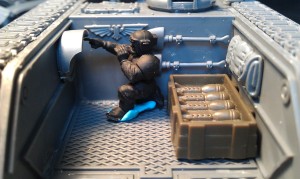
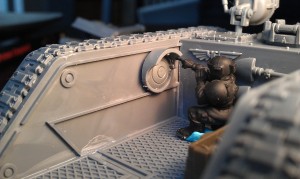
  8. Now we prepare the interior of the vehicle. I added some random stuff to the walls, a box of mortars from a toy soldiers kit I’ve had since I was 8, and, in a touch I’m particularly proud of, glued the searchlight to the wall to be painted as a radar screen.
  9. I’m just gonna show another picture of the radar screen, because I’m stupidly proud of that. I made the pointing guy with bits from the Cadian heavy weapons team. I intend to paint him separately and glue him in later (so he is blu-tacked for now)ctrl-f xenos
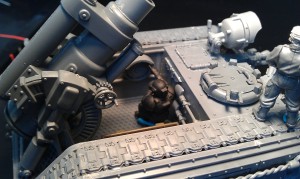
  10. Here is a photo showing the placement of the gun inside the chassis. I made the gun slightly off-center because I think it looks better that way and it allows the poor gunner to crawl his way out. The gun is blu-tacked in right now, but I intend to drill pins through the braces on the gun through the floor, so I can remove the gun for both battle damage and easy transport.where to put the gun
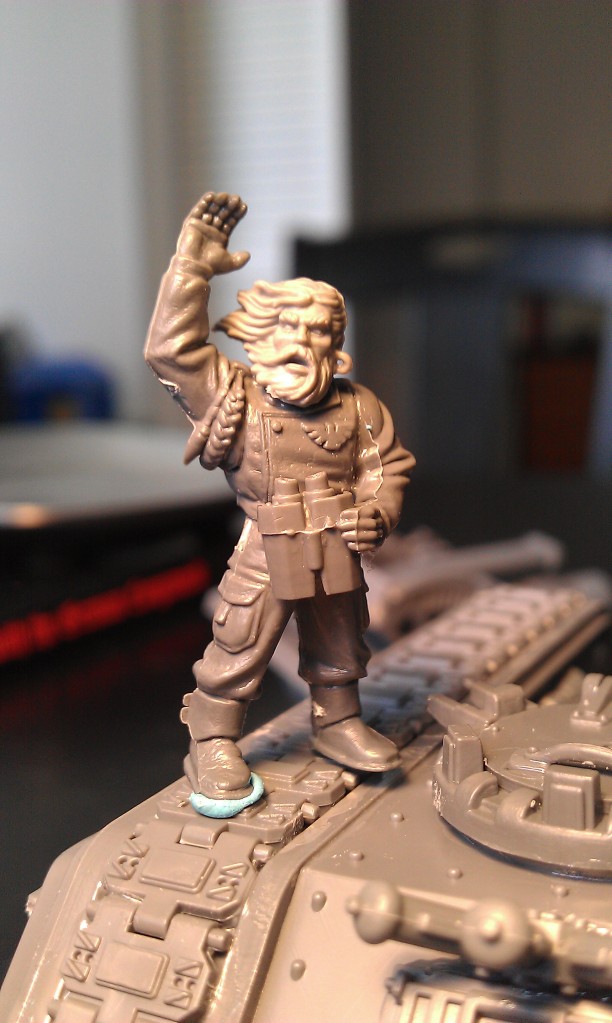
  11. Perhaps my favorite addition to the tank, meet Moses. I knew I needed another crew member, and decided to have him standing on the tracks of the stationary vehicle for a superior vantage point. I then noticed the hairy head from the Chaos Marauder sprue and decided to put it on him. I like the way the hair is blowing such that you could imagine it being tousled by the blast from the gun. I intend to put pins in his feet to make him removable for ease of transport. He has also inspired the name for the tank: Exodus.
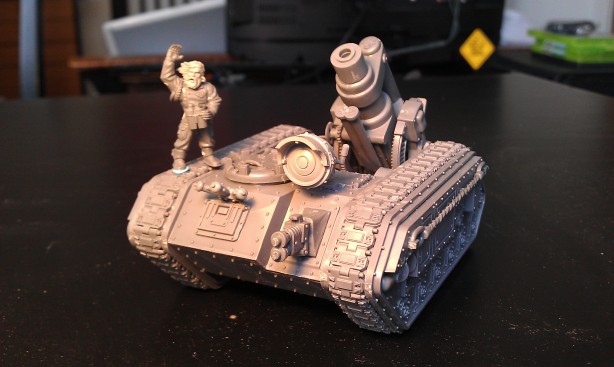
  12. Finally, the finished product. I will post painted pictures when I get around to it, but I hope this was enlightening and useful. Please comment if you found this page useful – then I don’t feel like I’m talking to myself. Cheers!

    Part the Red Sea!

    "Exodus" Mobile Artillery E1317

++THOUGHT OF THE DAY: A small mind is a tidy mind. +++

++END TRANSMISSION++